(function() {
document.addEventListener('DOMContentLoaded', function() {
var componentMetadata = JSON.parse('\x7b\x22componentName\x22\x3a\x22ActionToolbar_59e5fa31-dc57-46ea-93d1-265650a760f0\x22,\x22deferOptions\x22\x3a\x7b\x22deferComponent\x22\x3atrue,\x22deferType\x22\x3a\x22OnDemand\x22,\x22deferId\x22\x3a\x22r63f863b6a5f94dae8cb8a654fb789747\x22,\x22deferredContainerId\x22\x3a\x22\x2ffloatingActionToolbar\x2ffloatingActionToolbar_interop\x22,\x22deferredContainerView\x22\x3a\x22InteropDeferWrapper\x22\x7d,\x22viewName\x22\x3a\x22ActionToolbar\x22\x7d');
var configuration = {"contentId":"8dda4660-ee09-4295-b72d-62663c6cd692","toolbarSettings":{"id":"59e5fa31-dc57-46ea-93d1-265650a760f0","regAction":"FAVORITE","eSourceCode":11275,"namePassedToEvents":"ArticleStandardLongFormToolbar","buttons":[{"addFavoriteErrorMessage":"Sorry, something went wrong. Please save again.","removeFavoriteErrorMessage":"Error occurred while removing from favorites","regAction":"FAVORITE","eSourceCode":11275,"isCurrentUserAnonymous":false,"isFavoriteItem":false,"id":"16a29701-2b75-4d9a-aa9c-860376da50d7","allowedForAnonymousUsers":false,"type":"Favorite","displayName":"Save","namePassedToEvents":"Favorite","cssClassName":"atButtonFavorite","privacyOptOutMessage":"\u003cdiv class=\u0027privacyMessage\u0027\u003e\n\u003ch3\u003eThis feature is not available with your current cookie settings.\u003c/h3\u003e\n\u003cp\u003eYou can \u003ca href=\u0027#\u0027 data-show-preference-center=\u00271\u0027\u003eupdate your privacy settings\u003c/a\u003e to enable this content. Please enable “Functional Cookies” to use this feature.\u003c/p\u003e\n\u003c/div\u003e","showPrivacyOptOutMessage":false},{"providerName":"pinterest","providerNamePassedToEvents":"Pinterest","shareUrlFormat":"//pinterest.com/pin/create/link/?url={0}","id":"c18cf08e-e436-4cd0-a180-1bafb15369a6","allowedForAnonymousUsers":true,"type":"Social","displayName":"Pinterest","namePassedToEvents":"Pinterest","cssClassName":"atButtonPinterest","privacyOptOutMessage":"\u003cdiv class=\u0027privacyMessage\u0027\u003e\n\u003ch3\u003eThis feature is not available with your current cookie settings.\u003c/h3\u003e\n\u003cp\u003eYou can \u003ca href=\u0027#\u0027 data-show-preference-center=\u00271\u0027\u003eupdate your privacy settings\u003c/a\u003e to enable this content. Please enable “Functional Cookies” to use this feature.\u003c/p\u003e\n\u003c/div\u003e","showPrivacyOptOutMessage":false},{"templateId":"13bdd311-4300-4fb8-9d78-9cbaf98f5578","dialogHeading":"Email Article","emailCode":"BC_ContentEmail","dialogSettings":{"cancelButtonText":"Cancel","copyToSenderLabel":"Send a Copy to Myself","emailAddressesLabel":"* Email Address(es)","emailInstructionText":"Separate email addresses with commas","fromText":"From:","privacyPolicyText":"\u003cp\u003e\u0026copy;2024 General Mills, Inc. All Rights Reserved. This information will only be used to send an email to your friend(s) and will not be saved. Please read our \u003ca rel=\u0022noopener noreferrer\u0022 rel=\u0022noopener noreferrer\u0022 href=\u0022http://www.generalmills.com/company/privacy-policies/privacy-policy-us\u0022 target=\u0022_blank\u0022 shape=\u0022rect\u0022\u003ePrivacy Policy\u003c/a\u003e.\u003c/p\u003e","requiredFieldText":"* Required","sendButtonText":"Send","senderEmailAddressLabel":"* Your Email Address","senderFirstNameLabel":"* Your First Name","sendToText":"Send To:"},"id":"be9422a3-85a8-4c31-86f5-e171255bb89d","allowedForAnonymousUsers":true,"type":"Email","displayName":"Email","namePassedToEvents":"Email","cssClassName":"atButtonEmail","privacyOptOutMessage":"\u003cdiv class=\u0027privacyMessage\u0027\u003e\n\u003ch3\u003eThis feature is not available with your current cookie settings.\u003c/h3\u003e\n\u003cp\u003eYou can \u003ca href=\u0027#\u0027 data-show-preference-center=\u00271\u0027\u003eupdate your privacy settings\u003c/a\u003e to enable this content. Please enable “Functional Cookies” to use this feature.\u003c/p\u003e\n\u003c/div\u003e","showPrivacyOptOutMessage":false},{"providerName":"facebook","providerNamePassedToEvents":"Facebook","shareUrlFormat":"//facebook.com/sharer/sharer.php?u={0}","id":"6c3f442d-6ffe-460f-8360-b02b122d326c","allowedForAnonymousUsers":true,"type":"Social","displayName":"Facebook","namePassedToEvents":"Facebook","cssClassName":"atButtonFacebook","privacyOptOutMessage":"\u003cdiv class=\u0027privacyMessage\u0027\u003e\n\u003ch3\u003eThis feature is not available with your current cookie settings.\u003c/h3\u003e\n\u003cp\u003eYou can \u003ca href=\u0027#\u0027 data-show-preference-center=\u00271\u0027\u003eupdate your privacy settings\u003c/a\u003e to enable this content. Please enable “Functional Cookies” to use this feature.\u003c/p\u003e\n\u003c/div\u003e","showPrivacyOptOutMessage":false},{"layoutParameter":"p%3d1","id":"de022929-4416-4bc9-ab3c-ae5711d562bf","allowedForAnonymousUsers":true,"type":"Print","displayName":"Print","namePassedToEvents":"Print","cssClassName":"atButtonPrint","privacyOptOutMessage":"\u003cdiv class=\u0027privacyMessage\u0027\u003e\n\u003ch3\u003eThis feature is not available with your current cookie settings.\u003c/h3\u003e\n\u003cp\u003eYou can \u003ca href=\u0027#\u0027 data-show-preference-center=\u00271\u0027\u003eupdate your privacy settings\u003c/a\u003e to enable this content. Please enable “Functional Cookies” to use this feature.\u003c/p\u003e\n\u003c/div\u003e","showPrivacyOptOutMessage":false}],"isSticky":true},"userSettings":{"isCurrentUserAnonymous":true,"isFavoriteItem":false},"pageAttributes":{"url":"https%3a%2f%2fwww.bettycrocker.com%2fhow-to%2ftipslibrary%2fbaking-tips%2fhow-to-make-pumpkin-pie","contentId":"8dda4660-ee09-4295-b72d-62663c6cd692"},"recaptchaPublicKey":"6LfU_icUAAAAALSqSjRg5hqZwbPr1b8k-_80a_S_"};
var moduleName = 'actionToolbar';
var isVueModule = true;
GeneralMills.PandoSites.RegisterControlInstance(moduleName, configuration, componentMetadata, isVueModule)
});
})();
A slice of pumpkin pie is the sweetest way to end a hearty Thanksgiving feast. We’ll show you how to treat your guests — and yourself — to a delicious helping of our fan-favorite Pumpkin Pie, served with a delicious dollop of homemade whipped cream. The best part? It can be made ahead of time, so you can keep your eye on the bird.
If you’ve never made a pie from scratch, our prize-winning pumpkin is a great one to start with. All you need are a few simple kitchen utensils and ingredients. While this recipe calls for canned pumpkin puree, you can also make your own filling with fresh pumpkin. We’ll walk you through both methods so you can choose whichever you prefer.
Pumpkin Pie History
Before we get in to baking our scrumptious pumpkin pies, it’s worthwhile to note that the humble pumpkin has come a long way. The cultivation of pumpkins dates back to 5,500 BC in Central America, and pumpkins were one of the first foods the Europeans brought to the new world. They soon became among England’s favorite pie-making ingredients, pairing with spices and sweetened milk and sometimes being served without a crust. By around the 18th century, however, Thanksgiving had become an important American holiday, and traditional pumpkin pies as we know them today began to earn their place at the holiday table.
While pumpkin pie is often beloved for being an indulgent treat, pumpkin itself is actually extremely nutritious. Pumpkin is loaded with Vitamins A, C, and E, as well as magnesium and iron. Vitamin A is essential for healthy vision, and Vitamin E is an antioxidant that’s required for the proper function of many organs in the body. Magnesium acts to regulate blood pressure, and iron is essential for hemoglobin formation. So while we may not be able to get away with eating pie every day (we wish!) the actual pumpkin found in this Thanksgiving dessert does offer up a few hidden health benefits.
How to Make Betty’s Best Pumpkin Pie
To make your pumpkin pie, you’ll just need a few simple ingredients and tools. You’ll also need to make sure the pie has at least 2 hours of cooling time before serving — a nice excuse to make this ahead of time!
What you’ll need:
- Ingredients for Pumpkin Pie
- Small bowl
- Pie pan
- Large bowl
- Wire whisk
- Fork
- Knife
How to:
1. Pour flour, oil and ½ teaspoon salt into a bowl and mix with a fork.
2. Add 1 teaspoon of ice water at a time, tossing with a fork until all the water is absorbed. This dough will be your pastry filling.
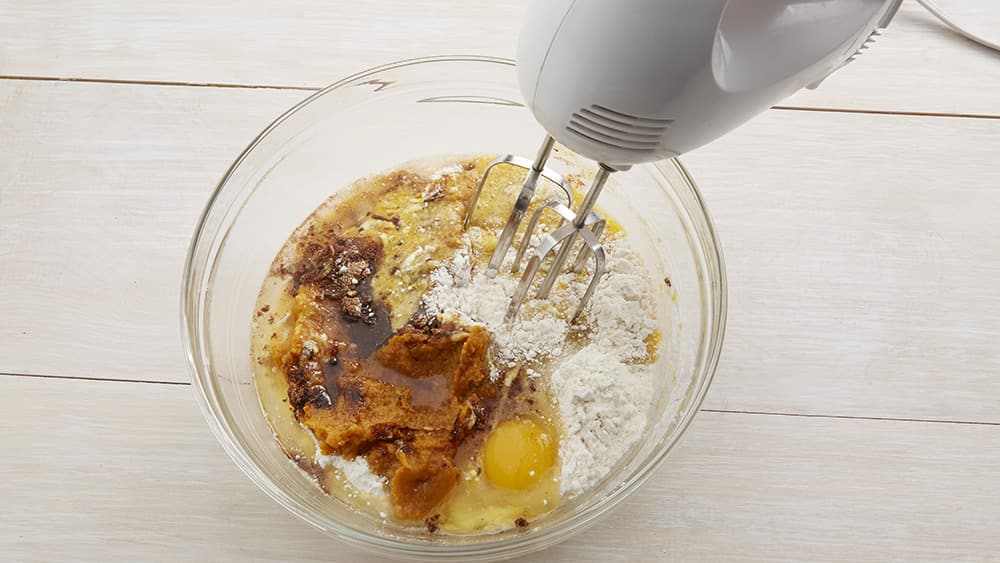
3. Shape dough into a ball and press into the pan — filling the bottom and sides. Meanwhile, in a large bowl, beat eggs with a wire whisk or hand beater. Beat in ½ cup sugar, cinnamon, ½ teaspoon salt, ginger, cloves, pumpkin and milk. This will be your pie filling.
4. To prevent spilling, place the pastry-lined pie pan in the oven. Pour filling into the shell. Bake for 15 minutes at 425°F; then lower the temperature to 350°F and bake for an additional 45 minutes.
5. Insert a knife into the center of the pie — it should come out clean when the pie is done. Let cool for about 2 hours.
How to Make Pumpkin Pie Crust
How to Make Pumpkin Pie Filling
Making the filling for pumpkin pie can be as simple as buying a can at the store, but you can exercise more control over the flavor of your pie by taking steps like making your own pumpkin pie spice or even roasting your own pumpkin to make puree. We’ll teach you how to make a pumpkin pie filling using canned pumpkin puree and how to make pumpkin pie filling from scratch using a whole, fresh pumpkin.
Canned Pumpkin Puree
When making a filling using canned pumpkin, you’ll want to make sure to use canned pumpkin puree, not pumpkin pie mix. The mix has sugar and spices already in it, so if you have purchased the pumpkin pie mix, follow the directions on the label.
The benefit of using canned pumpkin puree is the simplicity. You don’t need to break down a pumpkin, roast it or puree it, instead you can grab your can opener and get to work.
Here’s how to make pumpkin pie filling using canned pumpkin puree.
- Gather your equipment: a whisk or beaters, a medium bowl and a can opener.
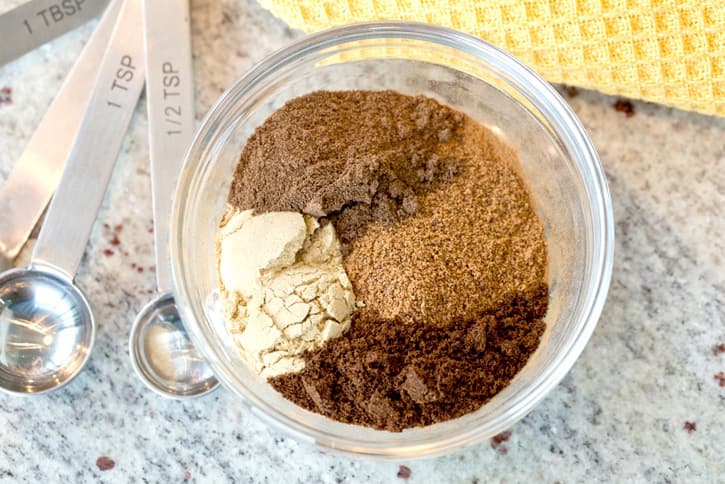
- Mix up a batch of pumpkin pie spice, using: 3 tablespoons ground cinnamon, 2 teaspoons ground ginger, 2 teaspoons ground nutmeg, 1 ½ teaspoons ground allspice and 1 ½ teaspoons ground cloves.
- Then, simply beat the ingredients in a bowl. In addition to canned pumpkin, most recipes call for eggs, pumpkin pie spice, evaporated milk, sugar and salt.

Homemade Pumpkin Puree
Passionate scratch bakers may want to try making homemade pumpkin puree using a fresh pumpkin. Sugar pumpkins are sweet, as the name implies, and great for baking.
Here’s how to make homemade pumpkin puree.
- Preheat the oven to 375°F, and gather your equipment, including a sharp knife, cutting board, sheet pan and food processor. Make cleanup easier by lining your sheet pan with aluminum foil.
- Begin by cutting the pumpkin in half, scooping out the seeds and discarding the stem. Then lay the squash flesh-side down on the sheet pan, rub the pumpkin with a neutral oil (such as canola) and bake until tender. Bake time will depend on the size of the pumpkin, but it should take about 20 minutes per pound.
- After baking the pumpkin and allowing it to cool completely, cut away the skin and discard. Then, puree the pumpkin flesh in a food processor until smooth. You will need 1 ½ cups of pumpkin to make a 9-inch pie. Store any excess pumpkin puree in the freezer for a future pie.
- One you have the pureed pumpkin, you can follow any pumpkin pie recipe calling for canned pumpkin puree. It will just be a matter of mixing in the other filling ingredients, as described above.

Pumpkin Pie Toppings
Now that you’ve let your pie cool, it’s time to serve it to some grateful guests. We like to serve our pumpkin pie with a dollop of homemade whipped cream. To do so, simply beat ¾ cup whipping cream and 2 tablespoons of sugar in a chilled medium bowl with an electric mixer on high speed until stiff peaks form. Easy as pie!
You can also serve your pie with a scoop of vanilla ice cream for an extra-sweet touch. Some people prefer to prepare a Streusel-Topped Pumpkin Pie by adding a streusel mixture for the last 10 minutes of baking. Our no-fail streusel mixture is:
- ½ cup quick-cooking oats
- ½ cup packed brown sugar
- ¼ cup butter, softened
Combine these three ingredients and sprinkle over the pie when it has about 10 minutes of baking time left, and your guests will be treated to a delicious streusel-topped pumpkin pie.
How to Store Pumpkin Pie
One of our favorite things about this pumpkin pie is that it can be made ahead of time. After you’ve baked it and let it cool, you can refrigerate it for up to three days before the big day. When it’s time to serve, simply take your pumpkin pie out of the refrigerator and it’s ready to go!
If you have any pumpkin pie leftovers you can also store them in the refrigerator for up to 3 days. We recommend storing your pie in an airtight container or with plastic wrap to best maintain its freshness. While some people freeze their pies, we don’t suggest doing so as the pie can become a bit watery when thawed and the filling can sometimes lose its custard-like texture.
Now that you’ve mastered pumpkin pie, learn how to make apple pie, how to cook a turkey
or check out our Thanksgiving Cheat Sheet for all the tips you need to pull off the perfect meal this year!
(function() {
document.addEventListener('DOMContentLoaded', function() {
var componentMetadata = JSON.parse('\x7b\x22componentName\x22\x3a\x22NewsletterCTA_b9911a56-3a0d-4b1c-8521-df6c10ce048a\x22,\x22deferOptions\x22\x3a\x7b\x22deferComponent\x22\x3atrue,\x22deferType\x22\x3a\x22OnDemand\x22,\x22deferId\x22\x3a\x22rd998e5374cc34df8ac8ce2afa25c5c72\x22,\x22deferredContainerId\x22\x3a\x22\x2fprimaryColumn\x2finteropInlineNewsletterCta\x22,\x22deferredContainerView\x22\x3a\x22InteropDeferWrapper\x22\x7d,\x22viewName\x22\x3a\x22NewsletterCTA\x22\x7d');
var configuration = {"unsubscribedNewsletters":[{"listId":"1e34a555-89d1-45f0-8f07-b3ae6b01c03c","thumbnailImageUrl":"/-/media/GMI/Core-Sites/BC/Images/Shared/myaccount/newsletters/BC_Thumb157x157.png?sc_lang=en","previewUrl":"https://morpheus3.idpk.net/email_sends/9111/preview","name":"Betty\u0027s Email","isPromo":false}],"settings":{"anonymousCopy":"Ready to Be Inspired?","anonymousDescriptionCopy":"We know you’ll love our daily tips, trends and tasty recipes sent right to your inbox.","anonymousThankYouCopy":"\u003cp\u003eThanks! Your first email is on its way.\u003c/p\u003e\n","anonymousThankYouDescriptionCopy":"\u003cp\u003e\u003cspan\u003eNow that you\u0026rsquo;re signed up, create an account on BettyCrocker.com to save your favorite recipes, learn more about special promotions and get inspired through Betty\u0026rsquo;s expert tips.\u003c/span\u003e\u003c/p\u003e","anonymousButtonText":"Sign up now","anonymousEmailInvalidErrorText":"Please enter a valid email address.","anonymousSubscribeErrorText":"We encountered an error while signing you up. Please try again.","anonymousEmailAddressPlaceholderText":"Enter your email address","anonymousEmailAddressLabel":"Email Address","anonymousLegalCopy":"By signing up, you accept our\u0026nbsp;\u003ca rel=\u0022noopener noreferrer\u0022 href=\u0022https://www.generalmills.com/privacy-security/us-english-privacy-policy\u0022 target=\u0022_blank\u0022\u003e\u003cspan style=\u0022text-decoration: underline;\u0022\u003ePrivacy Policy\u003c/span\u003e\u003c/a\u003e\u0026nbsp;and agree that your information may be used across our\u0026nbsp;\u003ca rel=\u0022noopener noreferrer\u0022 href=\u0022https://www.generalmills.com/food-we-make/brands\u0022 target=\u0022_blank\u0022\u003e\u003cspan style=\u0022text-decoration: underline;\u0022\u003efamily of brands\u003c/span\u003e.\u003c/a\u003e","requiredFieldText":"","standardSmallImageUrl":"/-/media/GMI/Core-Sites/BC/Images/BC/seasonal/2021_Christmas/ncta_bg.png","standardLargeImageUrl":"/-/media/GMI/Core-Sites/BC/Images/BC/seasonal/2021_Christmas/ncta_bg.png","backgroundColor":"#333333","accentColor":"","registrationUrl":"/register/reg-fp?RegAction=SUBSCRIBERUPGRADE\u0026esrc=11275\u0026returnUrl=%2fhow-to%2ftipslibrary%2fbaking-tips%2fhow-to-make-pumpkin-pie","registrationLinkText":"Join free!","enableExpandedFields":false,"hideForSessionCookieExpiration":0,"ctaType":"StandardAnonymous","location":"Inline","userState":"Anonymous","sourceCodeOverride":0}};
var moduleName = 'newsletterCta';
var isVueModule = true;
GeneralMills.PandoSites.RegisterControlInstance(moduleName, configuration, componentMetadata, isVueModule)
});
})();
(function() {
document.addEventListener('DOMContentLoaded', function() {
var componentMetadata = JSON.parse('\x7b\x22componentName\x22\x3a\x22ConsumerGeneratedContent_8dda4660-ee09-4295-b72d-62663c6cd692\x22,\x22deferOptions\x22\x3a\x7b\x22deferComponent\x22\x3atrue,\x22deferType\x22\x3a\x22OnDemand\x22,\x22deferId\x22\x3a\x22r43225896a6ed467ab8b32dfb4630f089\x22,\x22deferredContainerId\x22\x3a\x22\x2fratingReview\x2finteropRatingReview\x22,\x22deferredContainerView\x22\x3a\x22InteropDeferWrapper\x22\x7d,\x22viewName\x22\x3a\x22ConsumerGeneratedContent\x22\x7d');
var configuration = {"loaderScript":"https://apps.bazaarvoice.com/deployments/bettycrocker/main_site/production/en_US/bv.js","type":"QuestionAndAnswer","language":"en","includeRatings":false};
var moduleName = 'consumerGeneratedContent';
var isVueModule = true;
GeneralMills.PandoSites.RegisterControlInstance(moduleName, configuration, componentMetadata, isVueModule)
});
})();